

In the collaboration era, we need to enhance our perspective to work together online. GitHub is one of the platforms to encourage us by facilitating the opportunity in working together. This article will show you how to publish a simple website page in GitHub which is developed together with your team by using some tools had by GitHub such as Commit, Pull Request, etc.
1. Preparing your work
Before we are going to start working on this part, we need to take a look at the basic part to develop your code or your work.
In this example, we are going to publish web pages that use HTML and CSS. So, we will prepare the files both in HTML and CSS.
2. Create GitHub Repository
In terms of working together, you can decide on the owner of the main repository. The repository can be named by entering it in the form "Repository Name" in the middle of the page. It can be given by any name.

3. Uploading Files
The next step is uploading HTML/CSS Files
First, let's upload an HTML file called index.html. Or/and also upload styles.css
(in case you are the owner of the main repository)
If you are not the owner of the main repository, you need to click first the button of "fork", and then you can upload your file, and then do "commit" for changes, and finally click the "pull request".
4. Publishing webpages
Let's publish a webpage with the files you uploaded.
First, click the Settings tab on top right of the screen, and then click pages in the left side:
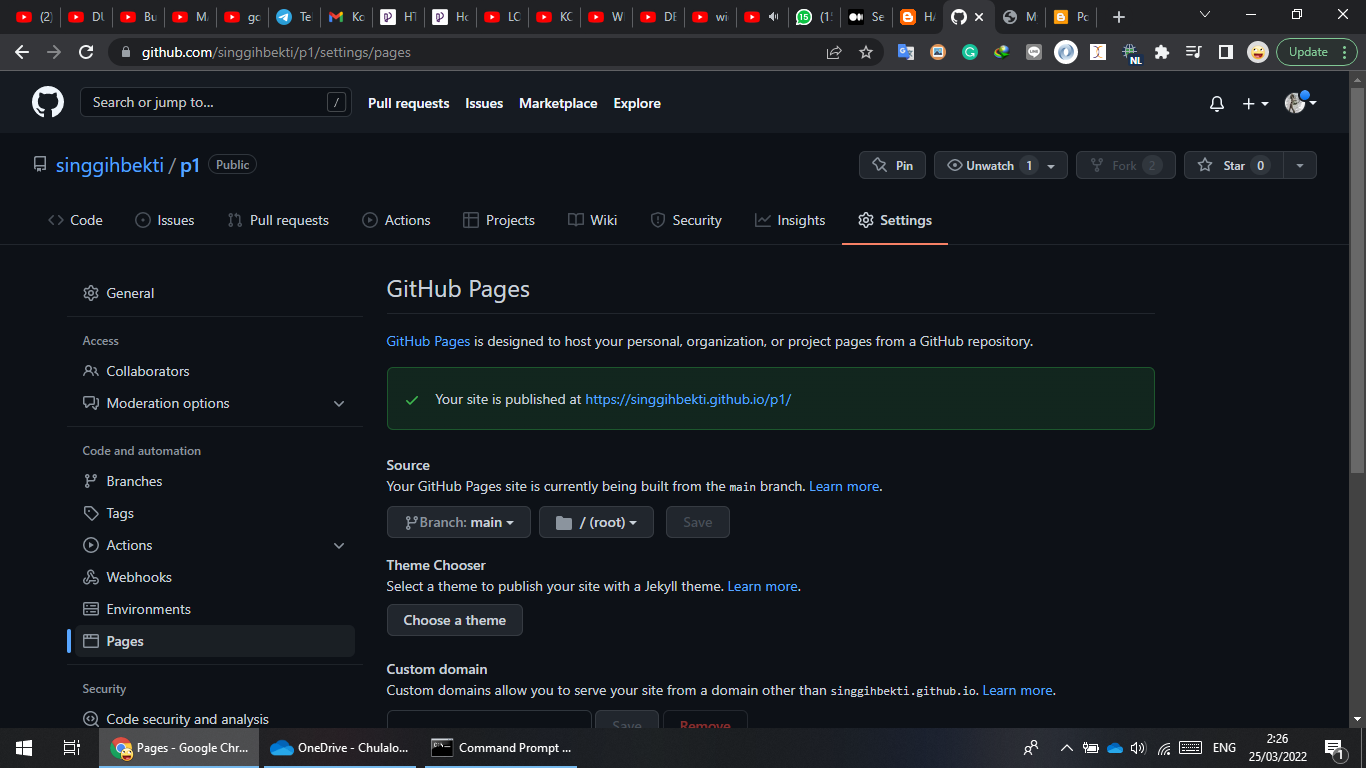
https://singgihbekti.github.io/p1/


Tidak ada komentar:
Posting Komentar